


While performing automation testing, even the most reliable of test cases might face roadblocks as the action progresses. A failed test case, for instance, is a sure sign that something has gone wrong. Test failure can either be due to some issue in the script or due to some issue in the AUT (Application Under Test). What’s even more challenging is debugging such deviation scenarios for the development as well as the testing teams. Capturing screenshots of the failed scenarios can be of great help to figure out where things went wrong. Screenshots in Selenium should be the way forward to make the most out of Selenium automation testing. In this blog, we deep dive into how to take screenshots in Selenium WebDriver using JavaScript.

Selenium WebDriver has built-in functionality to capture screenshots of the page, and it’s quite easy to use. It uses the TakesScreenshot interface for capturing the respective screenshot. This Selenium JavaScript tutorial shows the usage of TakesScreenshot method to take screenshots of a page and particular element. It is demonstrated with a step-by-step process that is executed over cloud-based Selenium Grid using Selenium automation testing.
Bonus Tip : If you are on Selenium 4, you can capture a screenshot of the page & WebElements with minimal instructions.
Why take screenshots when running a Selenium test
Before we go in-depth about how to take screenshots in Selenium WebDriver, let’s have a look as the ‘why’ part of capturing screenshots:
- Screenshots can be very useful in understanding the test execution flow of the application and its behavior.
- Capturing screenshots can be helpful in debugging any test scenario with ease.
- In case of a test failure, screenshots can help to identify if the problem is with the test script or the application under test.
- While executing a test script, screenshots at certain steps can be compared with the baseline image to verify if there is any deviation from the actual image.
- When we execute any Selenium test, sometimes we need to see the execution at later stages. So such screenshots can help us avoid re-execution of tests.
So taking or capturing screenshots during a Selenium test is essential and can be of great help. These screenshots can be in different forms, such as:
- Full page screenshot of the application under test.
- Screenshot of a particular element in the application.
- Screenshot of only the viewable part of the page.
How to take screenshots in Selenium WebDriver using JavaScript?
Now that we have understood the need to capture screenshots, it’s time for some action! Some classes (or interfaces) in the Selenium WebDriver can help us take screenshots of the AUT such as TakeScreenshot, AShot, etc. Let us deep dive into these classes one by one and see how to take screenshots in Selenium WebDriver using JavaScript.
Taking screenshots in Selenium JavaScript using the TakeScreenshot interface
Before getting to know about taking screenshots, let us first look at the TakeScreenshot interface of Selenium WebDriver in detail.
TakesScreenshot Interface in Selenium
The TakeScreenshot interface in the Selenium WebDriver package is made with the sole purpose of capturing screenshots of applications during Selenium test automation. The TakeScreenshot interface has a subinterface – WebElement, which indicates a WebDriver instance or an HTML element to capture a screenshot and store it as per the specified instructions.
Browsers that support TakeScreenshot Interface
Here is a list of browsers that support the TakeScreenshot interface:
Syntax:
Here is the basic syntax for how the TakeScreenshot interface can be used to take screenshots in Selenium using JavaScript.
driver.takeScreenshot().then(
    function(image) {
        require('fs').writeFileSync(file, image, encoding_system);
    }
);
Let me break the sequence of execution of the above code syntax:
- First, the TakeScreenshot interface of Selenium WebDriver is called using the driver.takeScreenshot() method.
- A promise is called using then.
- In the promise, a custom function is made with the parameter as the image. It is the captured image which is further returned by the driver.takeScreenshot() method.
- In the next step, the captured image is saved into a file with the specified name as ‘file’ and a desired ‘encoding system.’
Example 1:
Let us try to automate a test scenario where:
- The LambdaTest sample todo app is called using the URL https://lambdatest.github.io/sample-todo-app/.
- The 1st item in the list is clicked.
- The 2nd item in the list is clicked.
- A new item is added to the list with the name “New item.”
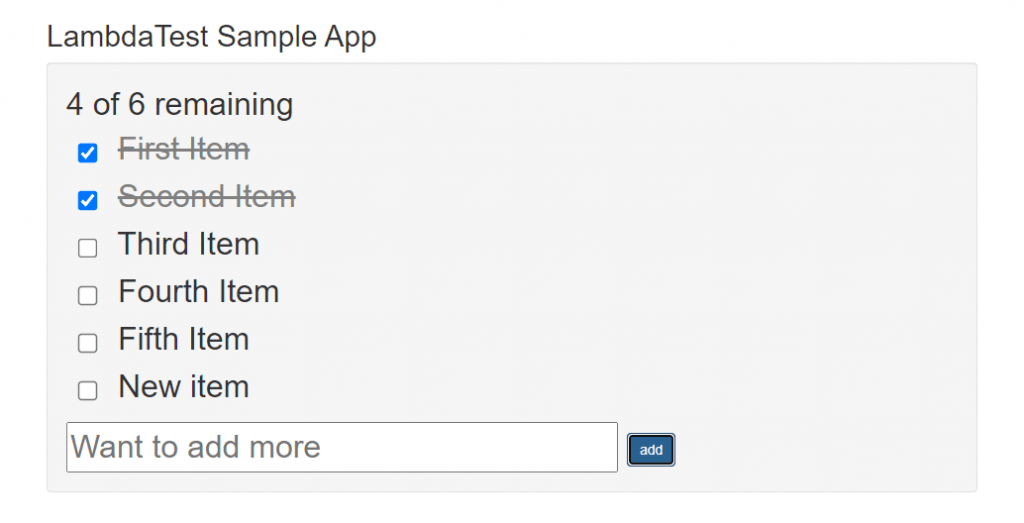
- The screenshot is captured of the application under test in the current state.
Below is the complete implementation of the test scenario automation:
// Include the chrome driver
require("chromedriver");
require("selenium-webdriver")
// Include selenium webdriver
let webdriver = require("selenium-webdriver");
var By = require("selenium-webdriver").By;
let browser = new webdriver.Builder();
let driver = browser.forBrowser("chrome").build();

driver.get('https://lambdatest.github.io/sample-todo-app/');

driver.findElement(By.name('li1')).click();
driver.findElement(By.name('li2')).click();
driver.findElement(By.id("sampletodotext")).sendKeys("New item");
driver.findElement(By.id("addbutton")).click();

driver.takeScreenshot().then(
    function(image) {
        require('fs').writeFileSync('captured_image_3.png', image, 'base64');
    }
);

driver.quit();
Code Walkthrough:
First, the required instances of Selenium WebDriver and ChromeDriver are called.
// Include the chrome driver
require("chromedriver");
require("selenium-webdriver")
// Include selenium webdriver
let webdriver = require("selenium-webdriver");
var By = require("selenium-webdriver").By;
The WebDriver is instantiated and a local instance of the Google Chrome browser is opened.
let browser = new webdriver.Builder();
let driver = browser.forBrowser("chrome").build();
Then, the LambdaTest sample ToDo app is navigated to by the Selenium WebDriver.
driver.get('https://lambdatest.github.io/sample-todo-app/');
The first item in the list is searched using the Name Selenium locator and then clicked.
driver.findElement(By.name('li1')).click();
Similarly, the second item in the list is searched using the name Selenium locator and then clicked.
driver.findElement(By.name('li2')).click();
Then the text box to input a new item is searched using Selenium locator ID, and then the text “New item” is passed.
driver.findElement(By.id("sampletodotext")).sendKeys("New item");
Once the text is input, now the add button is located and clicked. This inserts a new item to the list with the name “New item.”
driver.findElement(By.id("addbutton")).click();
In the next step, the screenshot of the application under test is taken and captured into a file, using the TakeScreenshot interface of Selenium WebDriver.
driver.takeScreenshot().then(
    function(image) {
        require('fs').writeFileSync('captured_image_3.png', image, 'base64');
    }
);
Once done, the test scenario is executed. Then, the Selenium WebDriver instance gets closed using the quit() method.
driver.quit();
Output:
Execute the test using the below-given command:
node take_screenshot_implementation.js
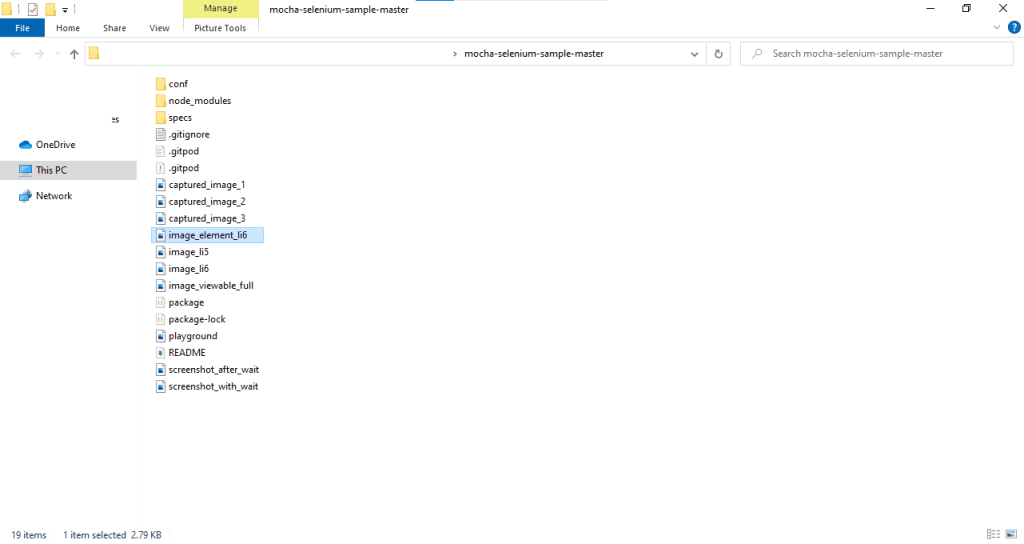
Once the test execution is complete, you can see the required image getting saved:
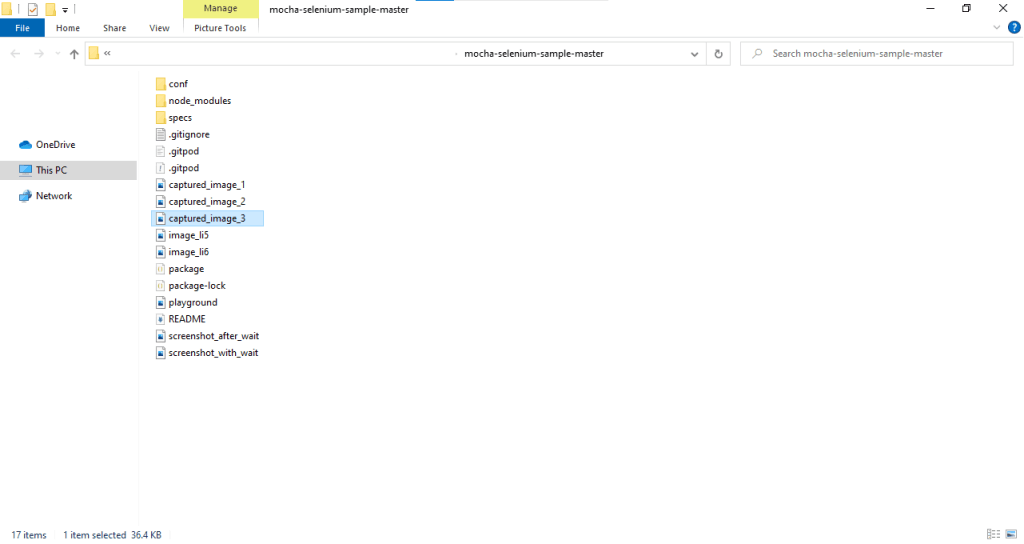
If you open the saved image, you can see the screenshot of the viewable area in the application, representing the test scenario executed:
Example 2:
Let us try to automate a different test scenario this time, where:
- The LambdaTest Dynamic Data Loading Selenium playground is called using the URL Dynamic Data Loading Demo.
- The “Get New User” button is clicked.
- The dynamic content of the page is loaded.
- The screenshot is captured of the application under test in the current state with the dynamic elements.
Below is the implementation to automate the required test scenario:
// Include the chrome driver
require("chromedriver");
require("selenium-webdriver")

// Include selenium webdriver
let webdriver = require("selenium-webdriver");
var By = require("selenium-webdriver").By;
let browser = new webdriver.Builder();
let driver = browser.forBrowser("chrome").build();

(async function () {

    // Navigate to the required URL
    driver.get('');

    // Press the Get New User button
    driver.findElement(By.id('save')).click();

    // Wait for 5 secs to let the dynamic content to load
    await driver.sleep(5000);

    // Take screenshot of the application with the dynamic content
    driver.takeScreenshot().then(
        function (image) {
            require('fs').writeFileSync('screenshot_with_wait.png', image, 'base64')
        });

    // Exit the driver
    driver.quit();

}());
Code Walkthrough:
First, the required instances of Selenium WebDriver and ChromeDriver are called.
// Include the chrome driver
require("chromedriver");
require("selenium-webdriver")
// Include selenium webdriver
let webdriver = require("selenium-webdriver");
var By = require("selenium-webdriver").By;
The WebDriver instance is then built, and a local instance of the Google Chrome browser is opened.
let browser = new webdriver.Builder();
let driver = browser.forBrowser("chrome").build();
Now we will do the required actions in an async state as we will be using Selenium explicit wait in this code.
// Include the chrome driver
require("chromedriver");
require("selenium-webdriver")

// Include selenium webdriver
let webdriver = require("selenium-webdriver");
var By = require("selenium-webdriver").By;
let browser = new webdriver.Builder();
let driver = browser.forBrowser("chrome").build();

(async function () {

    // Navigate to the required URL
    driver.get('');

    // Press the Get New User button
    driver.findElement(By.id('save')).click();

    // Wait for 5 secs to let the dynamic content to load
    await driver.sleep(5000);

    // Take screenshot of the application with the dynamic content
    driver.takeScreenshot().then(
        function (image) {
            require('fs').writeFileSync('screenshot_with_wait.png', image, 'base64')
        });

    // Exit the driver
    driver.quit();

}());
Then, the LambdaTest Dynamic Data Loading Selenium Playground is navigated to by the Selenium WebDriver.
// Navigate to the required URL
    driver.get('');
As per the test scenario, the “Get New User” button is searched and clicked using the ID Selenium locator to start loading the web page’s dynamic content.
// Press the Get New User button
driver.findElement(By.id('save')).click();
Now the major issue with dynamic content on a web page is that it takes time to load. Hence we cannot just go ahead and perform our next step. As a result, we need to use waits in Selenium to wait for the dynamic content to load successfully. That is why an explicit wait of 5 seconds is used.
// Wait for 5 secs to let the dynamic content to load
await driver.sleep(5000);
In the next step, the screenshot of the AUT is taken and captured into a file, using the TakeScreenshot interface of Selenium WebDriver.
// Take screenshot of the application with the dynamic content
driver.takeScreenshot().then(
        function (image) {
            require('fs').writeFileSync('screenshot_with_wait.png', image, 'base64')
        });
Once done, the test scenario is executed. Close the existing instance of Selenium WebDriver using the quit() method.
driver.quit();
Output:
Execute the test using the below-given command:
node take_screenshot_implementation2.js
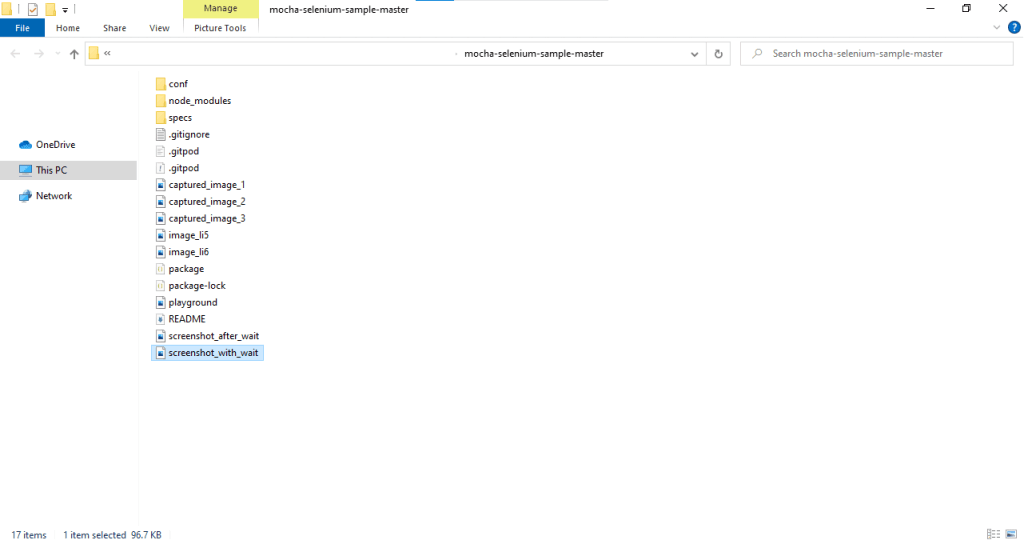
Once the test execution is complete, you can see the required image getting saved:
If you open the saved image, you can see the screenshot of the viewable area in application, representing the test scenario executed. The expected screenshot must have an image, a first name, and a last name in it, loaded with the help of dynamic page loading content.
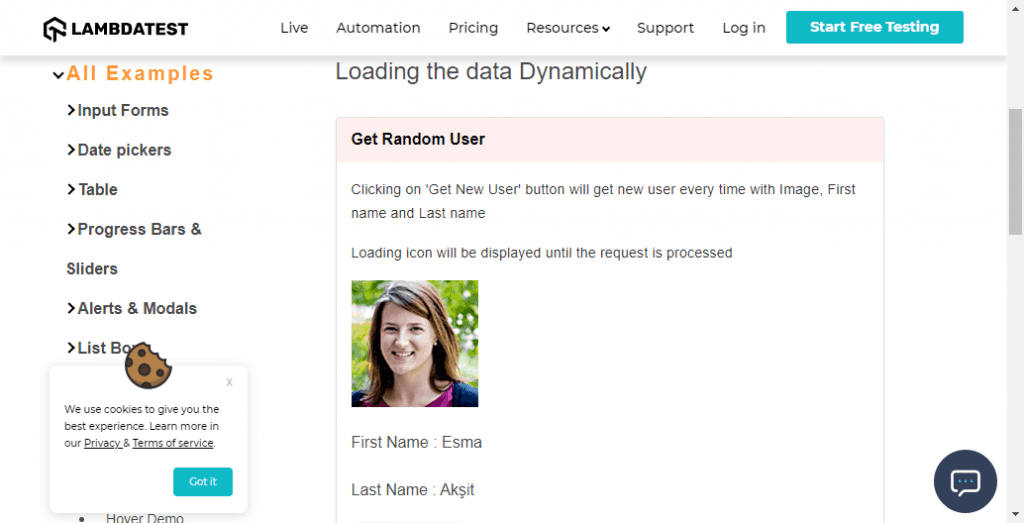
As you can see, the dynamic data has been loaded successfully, and the screenshot has also been captured.
For a quick overview on getting started with JavaScript, check out the video below from LambdaTest YouTube Channel.
Taking screenshots of a particular element in Selenium JavaScript
Till now, we looked at how to take a screenshot of the viewable area of the AUT in Selenium using JavaScript. What if we need to take screenshots of a specific region or a particular element on the page. The TakeScreenshot interface of Selenium WebDriver can be used to do this as well. But, since the TakeScreenshot interface always takes the screenshot of the complete viewable area, the question is how?
Steps to take screenshots of a particular WebElement
To take the screenshot of a particular WebElement, you need to follow the below steps:
- Take a screenshot of the complete viewable area using the TakeScreenshot interface.
- Get the Position and dimensions of the element around which you want to take the screenshot.
- Crop the original image to the fetched dimensions of the element.
- Save the modified image.
Prerequisites:
Steps 1, 2, and 4 can be performed with the help of Selenium JavaScript. To perform step 3, (i.e. crop the image), external libraries such as Sharp, EasyImage, etc. can be used. For our demonstration, we have used the Sharp library. To install Sharp, run the following command on the terminal:
npm install sharp
Example:
Let us try to automate a test scenario where:
- The LambdaTest sample todo app is called using the URL lambdatest.github.io/sample-todo-app.
- A new item is added to the list with the name “New item.”
- The screenshot is captured of only this newly added item.
Below is the complete implementation of the above test scenario:
const sharp = require('sharp')

// Include the chrome driver
require("chromedriver");
require("selenium-webdriver")
// Include selenium webdriver
let webdriver = require("selenium-webdriver");
var By = require("selenium-webdriver").By;
let browser = new webdriver.Builder();
let driver = browser.forBrowser("chrome").build();

driver.get('https://lambdatest.github.io/sample-todo-app/');

driver.findElement(By.id("sampletodotext")).sendKeys("New item");
driver.findElement(By.id("addbutton")).click();

driver.takeScreenshot().then(
    function (image) {
        require('fs').writeFileSync('image_viewable_full.png', image, 'base64')
    });

try {

    var _height = 0, _width = 0, _left = 0, _top = 0;

    driver.findElement(By.xpath('/html/body/div/div/div/ul/li[6]'))
        .getLocation().then(location => {
            _left = location.x;
            _top = location.y;
        });
    driver.findElement(By.xpath('/html/body/div/div/div/ul/li[6]'))
        .getSize().then(size => {
            _width = size.width;
            _height = size.height;
        });


    (async function () {

        await driver.sleep(5000);

        sharp('image_li6.png')
            .extract({ left: parseInt(_left), top: parseInt(_top), width: parseInt(_width), height: parseInt(_height) })
            .toFile('image_li6_crop.png')
            .then(function (new_file_info) {
                console.log("Image cropped and saved");
            })
            .catch(function (err) {
                if (err) console.log(err);
            });

    }());
}
catch (err) {
    console.log("Error: " + err);
};
driver.quit();
Code Walkthrough:
First, the required instances of Selenium WebDriver and ChromeDriver are called.
// Include the chrome driver
require("chromedriver");
require("selenium-webdriver")
// Include selenium webdriver
let webdriver = require("selenium-webdriver");
var By = require("selenium-webdriver").By;
The WebDriver instance is then built, and a local instance of the Google Chrome browser is opened.
let browser = new webdriver.Builder();
let driver = browser.forBrowser("chrome").build();
Then, the LambdaTest sample todo app is navigated to by the Selenium WebDriver.
driver.get('https://lambdatest.github.io/sample-todo-app/');
The text box to input a new item is searched using Selenium locator ID, and then the text “New item” is passed.
driver.findElement(By.id("sampletodotext")).sendKeys("New item");
Once the text is input, now the add button is found and clicked. This inserts a new item to the list with the name “New item.”
driver.findElement(By.id("addbutton")).click();
In the next step, the screenshot of the application under test is taken and captured into a file, using the TakeScreenshot interface of Selenium WebDriver.
driver.takeScreenshot().then(
    function (image) {
        require('fs').writeFileSync('image_viewable_full.png', image, 'base64')
    });
We have the original image of the current state of the application captured. Now we need the dimensions of the newly added item so that image can be cropped. To store that, we will create four variables to keep the value of the corresponding dimension.
var _height = 0, _width = 0, _left = 0, _top = 0;
Among the required four dimensions, first, the left and top positions are fetched using the getLocation() method and stored as per the requirement.
driver.findElement(By.xpath('/html/body/div/div/div/ul/li[6]'))
        .getLocation().then(location => {
            _left = location.x;
            _top = location.y;
        });
Then the width and the height of the newly added li6 element are fetched using the getSize() method and stored.
driver.findElement(By.xpath('/html/body/div/div/div/ul/li[6]'))
        .getSize().then(size => {
            _width = size.width;
            _height = size.height;
        });
Since we have the required dimensions of the li6 item now, we can crop the captured screenshot using the Sharp package. As you can see, the Sharp object takes one parameter which is the image file. With the help of the extract() method, the image is then cropped. Once cropped, we can save the modified file to the same file or a new one, using the toFile() method.
sharp('image_element_li6.png')
            .extract({ left: parseInt(_left), top: parseInt(_top), width: parseInt(_width), height: parseInt(_height) })
            .toFile('image_li6_crop.png')
            .then(function (new_file_info) {
                console.log("Image cropped and saved");
            })
            .catch(function (err) {
                if (err) console.log(err);
            });
Once done, the test scenario is executed. Then, the Selenium WebDriver instance gets closed using the quit() method.
driver.quit();
Output:
To trigger the test, run the below command on the terminal:
node screenshot_of_element.js
On successful execution, the captured image file is stored in the desired location (or directory).
If you open the saved image, you can see the screenshot of only the newly added 6th item in the list with the name “New item” and not the complete viewable area, representing the test scenario executed:

How to take screenshot of a particular WebElement using Selenium 4 and JavaScript
In Selenium 3, the approach to capture the screenshot of the entire web page was pretty simple and straightforward. However, capturing the screenshot of a WebElement in the page required a fair bit of calculations! You would have witnessed this tedious calculation exercise in the earlier section where we demonstrated how to capture a screenshot of a WebElement in Selenium 3.
Things are set to change with Selenium 4, considering the fact that it is relatively easy to update from Selenium 3 to Selenium 4.
One of the welcome changes in Selenium 4 is the ability to capture the screenshot of a particular WebElement with ultra ease. You no longer need to use third-party libraries to capture the screenshot of a WebElement.
Here are the steps you need to perform for capturing WebElement screenshot with Selenium 4:
- Locate the desired WebElement using the appropriate web locators (e.g. XPath, ID, CSS, etc.).
- Once the WebElement (e.g. ele) is located, use \.takeScreenshot(true) method for capturing the element screenshot (in the desired image format – base64)
Now that we have covered the steps to capture element screenshot with Selenium 4 & JavaScript, let’s get our hands dirty with the implementation:
const {By,Key,Builder} = require("selenium-webdriver");
require("chromedriver");

let fs = require('fs');

async function WebElementCapture(){
       //To wait for browser to build and launch properly
       let driver = await new Builder().forBrowser("chrome").build();

        //To fetch https://lambdatest.github.io/sample-todo-app/ from the browser with our code.
        await driver.get("https://lambdatest.github.io/sample-todo-app/");

        //Add a new item in the list
        await driver.findElement(By.id("sampletodotext")).sendKeys("Add a new item in the list");
        await driver.findElement(By.id("addbutton")).click();

        let ele = await driver.findElement(By.xpath('/html/body/div/div/div/ul/li[6]'));

        //Capture the element screenshot
        let encodedString = await ele.takeScreenshot(true);
        await fs.writeFileSync('./image_li6_crop.png', encodedString, 'base64');
        await driver.quit();
}
WebElementCapture()
Code Walkthrough:
Implementation has only changed in the area where the TakeElementScreenshot method is used to capture a screenshot of the WebElement.
To get started, we add a new item (i.e. Add a new item in the list) in the LambdaTest ToDo app.
await driver.findElement(By.id("sampletodotext")).sendKeys("Add a new item in the list");
await driver.findElement(By.id("addbutton")).click();
Now that the item is added to the list, it is located using the XPath locator.
let ele = await driver.findElement(By.xpath('/html/body/div/div/div/ul/li[6]'));
The takeScreenshot method is used on the required WebElement (i.e. ele in this case) and the captured image is written to the file system in the base64 encoded format.
let encodedString = await ele.takeScreenshot(true);
await fs.writeFileSync('./image_li6_crop.png', encodedString, 'base64');
That’s all. This is all that is required to capture screenshot of a desired WebElement in Selenium using JavaScript.
Execution:
Run the following command on the terminal to trigger the test
node ImageCapture.js
A new item is added to the ToDo list. A screenshot of the new item is taken and stored in the given location in the file system. As mentioned earlier, the screenshot is stored in the base64 encoded format. As seen below, an image by the name image_li6_crop.png is created in the designated folder.
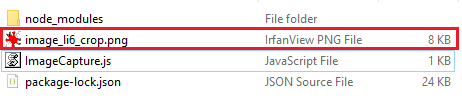
Here is the screenshot of the newly added element.

If you are intrigued to learn more about Selenium 4, do check out Selenium 4 Learning Hub on LambdaTest. It’s your go-to place to deep dive into the various facets of Selenium 4!
We have seen how to take screenshots in Selenium WebDriver using JavaScript. Using a local setup has severe shortcomings, especially when the test cases are extremely long or when screenshots have to be captured at multiple test steps. Here are some of the major drawbacks of using a local Selenium setup for capturing screenshots:
- For larger test scenarios, taking screenshots becomes difficult to implement.
- Using Local setup can become tedious when screenshots have to be captured at multiple steps.
- Full page screenshots can take up a huge chunk of system memory.
To overcome these shortcomings, it is recommended to use LambdaTest, an online Selenium grid that helps you run your tests on 2000+ browsers, browser versions, and operating systems. That’s not all, the platform captures screenshots automatically at every test step.
How to capture screenshots step-by-step on LambdaTest
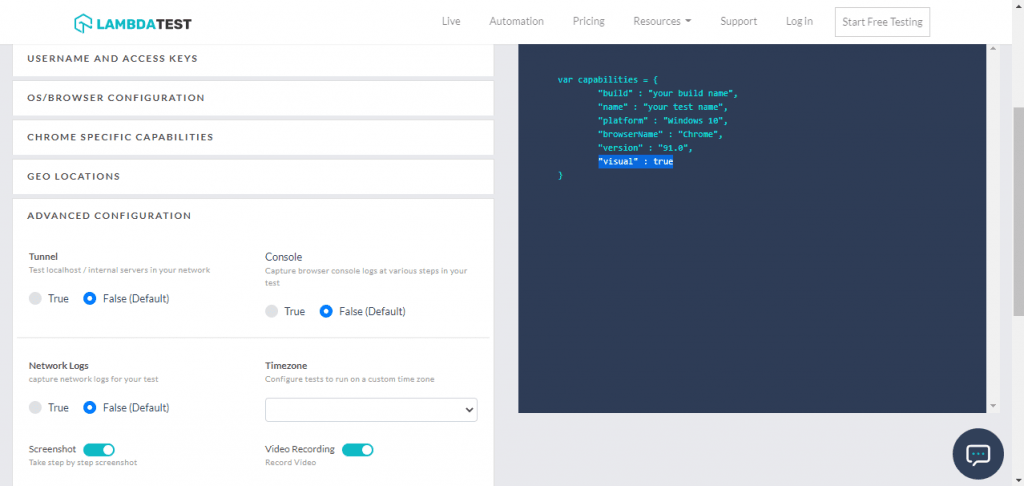
To capture the screenshot on the LambdaTest platform at every test step, you need to pass the “visual” capability in the desired capabilities. This capability is available in the advanced configuration of the capabilities generator. When “visual” is set to “true”, LambdaTest will record a step by step screenshot of your test.
Syntax:
Below is an example of the desired capabilities with the “visual” capability passed as “true”. This is instrumental in capturing screenshots at every test step.
capabilities = {
  'build': ’Capture Screenshots’, //Build name
  'name': 'Your Test Name', // Test name
  'platform':'MacOS Big sur', // OS name
  'browserName': 'Firefox', // Browser name
  'version': '89.0', // Browser version
  "resolution" : "1280x960",

  'visual': true,  // To take step by step screenshot

  'network':false,  // To capture network Logs
  'console':false, // To capture console logs.
  'tunnel': false // If you want to run the localhost then change it to true
  };
Example:
Consider the below example that solves the below test scenario:
- The LambdaTest sample todo app is called using the URL https://lambdatest.github.io/sample-todo-app/.
- The 1st item in the list is clicked.
- The 2nd item in the list is clicked.
- A new item is added to the list with the name “New item.”
- The screenshot is captured of the application under test in the current state.
The test is run on the LambdaTest platform. As the prerequisites, we first need to get the username, access key, and the desired capabilities.
- Get the username and access key from the LambdaTest Profile section, and update the below code snippet for the Grid URL. Grid URL is your specific Remote WebDriver route on which the tests will be executed.
String gridURL = "http://" + username + ":" + accesskey + "@hub.lambdatest.com/wd/hub";
- Next, get the desired capabilities from the LambdaTest Capabilities Generator:
var capabilities = {
        "build" : "your build name",
        "name" : "your test name",
        "platform" : "'MacOS Big sur",
        "browserName" : "Firefox",
        "version" : "89.0",
        "visual" : true
    }
- We need to create the Remote WebDriver instance and initialize it with the above capabilities and Grid URL.
LT_USERNAME = "username";
LT_ACCESS_KEY = "access key";

caps = {
  'build': 'Capture Screenshots', //Build name
  'name': 'Your Test Name', // Test name
  'platform':'MacOS Big sur', // OS name
  'browserName': 'Firefox', // Browser name
  'version': '89.0', // Browser version
  "resolution" : "1280x960",
  'visual': true,  // To take step by step screenshot
  'network':false,  // To capture network Logs
  'console':false, // To capture console logs.
  'tunnel': false // If you want to run the localhost then change it to true
  };

var buildDriver = function () {
    return new webdriver.Builder()
        .usingServer(
            "http://" +
            LT_USERNAME +
            ":" +
            LT_ACCESS_KEY +
            "@hub.lambdatest.com/wd/hub"
        )
        .withCapabilities(caps)
        .build();
};
That’s it. Now we can use this Remote WebDriver instance to write and execute our test to show how to take screenshots in Selenium WebDriver. Below is the complete JavaScript code for the same:
LT_USERNAME = "username";
LT_ACCESS_KEY = "access key";

exports.capabilities = {
  'build': 'Capture Screenshots', //Build name
  'name': 'Your Test Name', // Test name
  'platform':'MacOS Big sur', // OS name
  'browserName': 'Firefox', // Browser name
  'version': '89.0', // Browser version
  "resolution" : "1280x960",
  'visual': false,  // To take step by step screenshot
  'network':false,  // To capture network Logs
  'console':false, // To capture console logs.
  'tunnel': false // If you want to run the localhost then change it to true
  };
var By = require("selenium-webdriver").By;

var assert = require("assert"),
    webdriver = require("selenium-webdriver"),
    conf_file = process.argv[3] || "conf/single.conf.js";

var caps = require("../" + conf_file).capabilities;

var buildDriver = function (caps) {
    return new webdriver.Builder()
        .usingServer(
            "http://" +
            LT_USERNAME +
            ":" +
            LT_ACCESS_KEY +
            "@hub.lambdatest.com/wd/hub"
        )
        .withCapabilities(caps)
        .build();
};

describe("Capture Screenshot " + caps.browserName, function () {
    var driver;
    this.timeout(0);

    beforeEach(function (done) {
        caps.name = this.currentTest.title;
        driver = buildDriver(caps);
        done();
    });

    it("Take Screenshot JavaScript", function (done) {

        driver.get('https://lambdatest.github.io/sample-todo-app/');

        driver.findElement(By.name('li1')).click();
        driver.findElement(By.name('li2')).click();
        driver.findElement(By.id("sampletodotext")).sendKeys("New item");
        driver.findElement(By.id("addbutton")).click();
    });

    afterEach(function (done) {
        if (this.currentTest.isPassed) {
            driver.executeScript("lambda-status=passed");
        } else {
            driver.executeScript("lambda-status=failed");
        }
        driver.quit().then(function () {
            done();
        });
    });
});
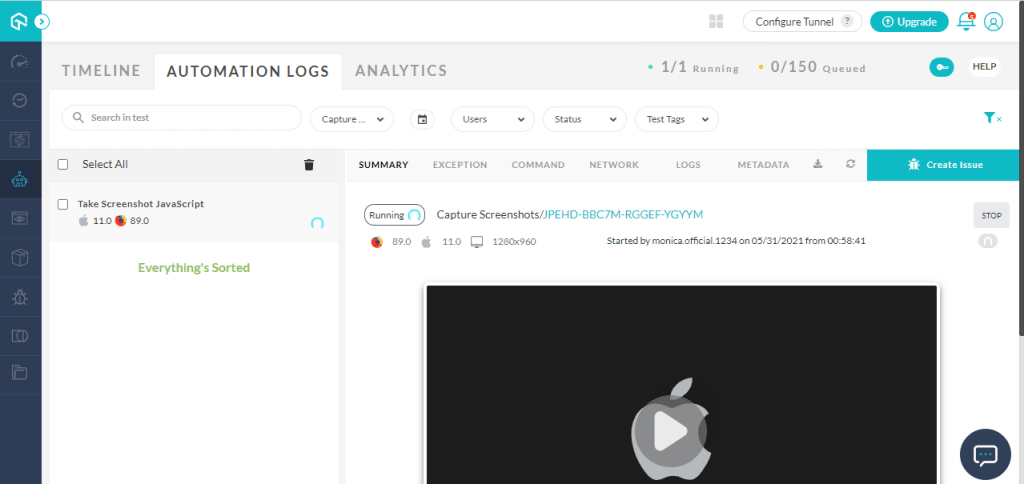
Upon execution, you can see the test getting run on the desired environment configuration on the LambdaTest platform.
How to view screenshots step-by-step on LambdaTest?
You can view the screenshots step-by-step on the LambdaTest platform. Just go to the Commands tab of the test, and you will see the screenshots along with all the steps. You can view or download any of the screenshots as and when required.
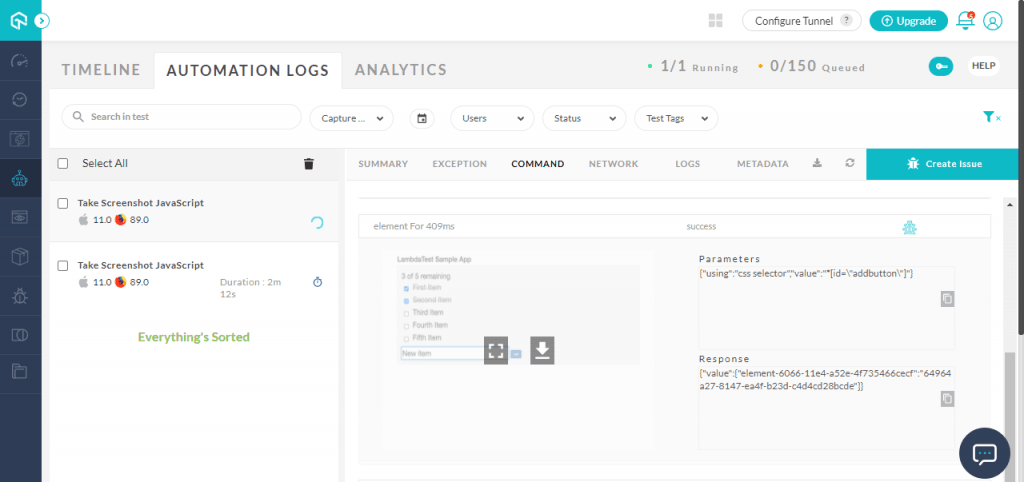
Below is one of the screenshots, where we send keys to enter the name of the 6th item in the list as New item, captured by LambdaTest.

Conclusion

The UI of a webpage is often very complex, and to test the complete UI, Selenium automation testing is the most effective way. Capabilities offered by Selenium automation testing can be enhanced by capturing page (or WebElement) screenshots for the failed test scenarios.
Taking screenshots in Selenium WebDriver using JavaScript can be super helpful in checking problematic areas on the page. Taking such screenshots can help you witness the execution as the desired point and debug your tests in a much easier and faster way. Online tools like LambdaTest can help you capture step by step screenshots of your test with a minimal addition in the test capabilities.
We hope you learned how to take screenshots in Selenium WebDriver using JavaScript.
Happy Testing!